Thursday, February 28, 2013

Drop Cloth Curtains


If you frequent blogland much, this won't be anything new to you.  I'm not really sure why I didn't do this sooner, especially since I spent about $60 on living room curtains that would have worked great for this project.  It's super simple and super affordable.  That's a combination you can't beat.
These are some of my favorites I found on the web.
Decor Allure
The Old White Cottage
Lily Button Design
So here's the story:  I've been on the lookout for some curtain panels to hang in the playroom/den for awhile.  I originally thought the matchstick shades would do the trick, but the room was just missing something.  It was converted from a garage, so the window placement is a little funny.  There are three windows and all three start at the ceiling, so the 84' panels that are found everywhere won't work.  I didn't want a lot of $ in them, and even though I'm adding color to the room, I didn't really want it in the curtains.  
My first trip to Wal-Mart was a failure.  They had like a 9x20.  Um, a little big.  The color was good, but after getting it home I decided that cutting it in half and sewing having someone sew two sides was just a little too much work, so it went in the return pile.  The next night I went to Lowe's.  I finally located the size I needed and guess what?  SOLD OUT!  Seriously?  Did everyone in BG have the same idea as me?  But what was that?  Up on the VERY TOP SHELF. . . . Yep, a whole box of 6x9 cloth drop cloths!  I'll take two!  
After a good washing, lots of fabric softener, and a couple of hours of ironing, they were ready to hang.

I - AM - IN - LOVE!  

So here's the full length picture (yep, that's my camper you see in the window).  
The clip rings were on clearance at Lowe's for $5.  I had to buy three packs of 7 since the curtains are so wide.  They were silver, but a little bit of spray paint fixed that.  
Hope you love them as much as I do!

Friday, February 22, 2013

Feeling Inspired

I'm feeling inspired - maybe because of this wonderful wonderful new blog I've found (more about that in another post), maybe because I'm tired of all the tan, cream and gray in my house, maybe because I'm sooooooooo ready for Spring and the colors that it brings.  
After lots of debating, I've decided to infuse some blue, yellow and orange into the house.  These projects are really about repurposing some of the things in my house that are stuck in closets or hiding under a bed.  So, on a weeknight trip to Wal-Mart, I scored BIG  TIME!  I was immediately drawn to a Robin's Egg Blue color and couldn't believe that it was the ONE BLUE COLOR that they sold in a tester.  They also had a really pretty golden yellow and orange in a tester, so I picked up those too!
I was itching to paint something but really wanted to make sure the color was right before I took the plunge.  Who knew that a quick trip in TJ Maxx would give me just what I needed!  
Pillow, flower pot, and lanterns (in bag) from TJ.  Crate from Rock Garden.  Wooden hanging boxes from Decor Steals.
This pillow is gorgeous!  It has all the colors in it I'm looking to incorporate and has varying shades of blue.  I really must add another photo of the front and back.  Seriously in love.  
I was so excited to break out my blue paint that I didn't even take a before picture.  Luckily, I bought TWO lanterns.  These were a great size, looked fairly simple to paint, perfect design (LOVE the Xs) and were only $10 each!
Before on right - after on left.
This is the Glidden tester in Deepest Aqua.  I paid $2.94 for it at Wal-Mart.  It looks like there were some coupons floating around on the web back in August and you could get it for $.94, but that was then and this is now.  I still didn't think the price was bad considering it had a built-in brush which means NO CLEAN UP FOR ME!! (Score!)  Since I only plan on painting some frames and accessories, the built-in brush should work fine.  
Here's the finished product!  I love, love, love the lanterns and can't WAIT to see how they look on the mantle.  

Till next time!
JH

Sunday, February 17, 2013

I Heart Pillows

I stopped by my favorite store, TJ Maxx, yesterday and crushed on some pillows.  I really need pillows for the couch, but really wanted a pillow for my bed.  Right there, on the end cap between the rugs and the comforters, was a rectangle ruffle pillow in just the shabby chic look that I love.  It adds just the feminine touch it needed!
 This is how the bed looked before.  
 The pin striped Ralph Lauren pillow found a new home in the den.

Picture Frame Project

I have been wanting to do this little project F-O-R-E-V-E-R-!!!  I mean, I've even had the stuff to do it F-O-R-E-V-E-R-!!!  Since Brady was sick Friday, I was at home Friday.  Since I was at home Friday, I got almost ALL of my "chores" done for the weekend leaving me some time today for my little project.  

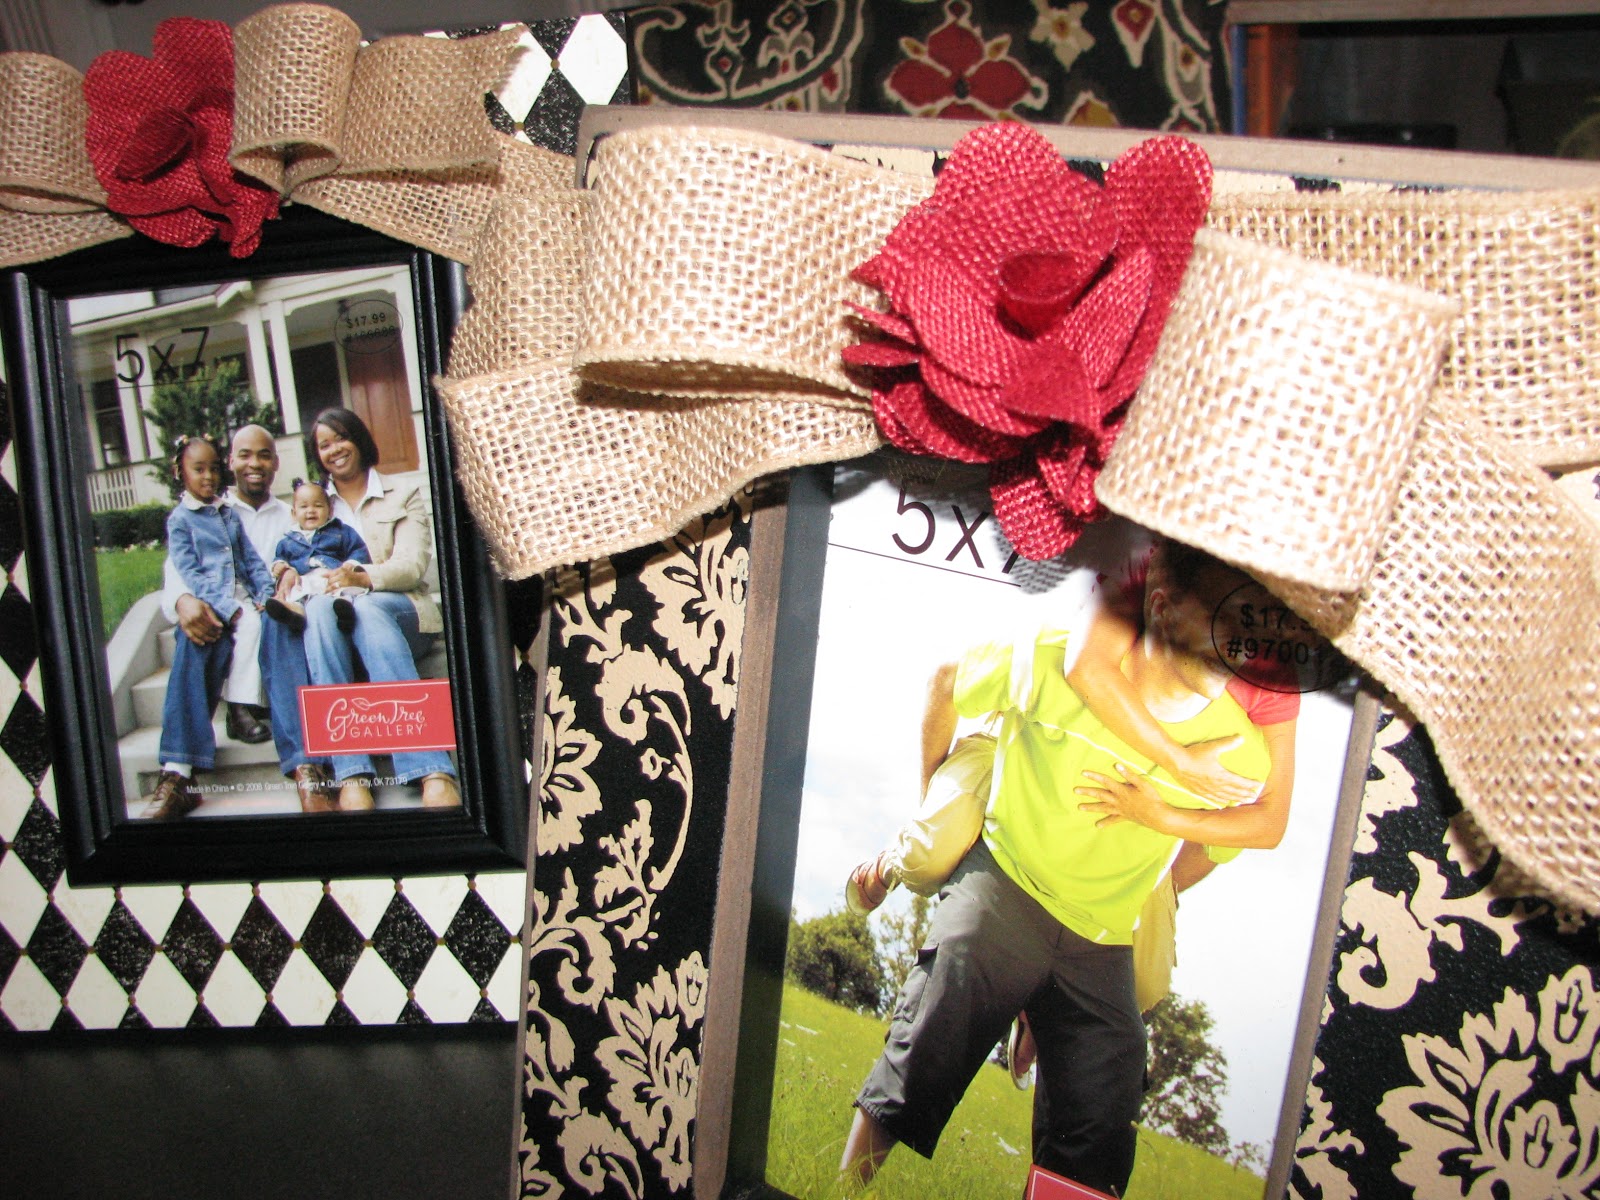
These were the cutest picture frames I could find at Hobby Lobby.  They were about $8 each (yes, I got them 50% off).  The two rosettes also came from Hobby Lobby and I used my 40% off coupon on them making them about $1.25 each.  The wired burlap ribbon came from Trees and Trends.  Hobby Lobby was ALWAYS sold out, and Trees and Trends was actually cheaper.  
Nothing like a project with the ole' hot glue gun.
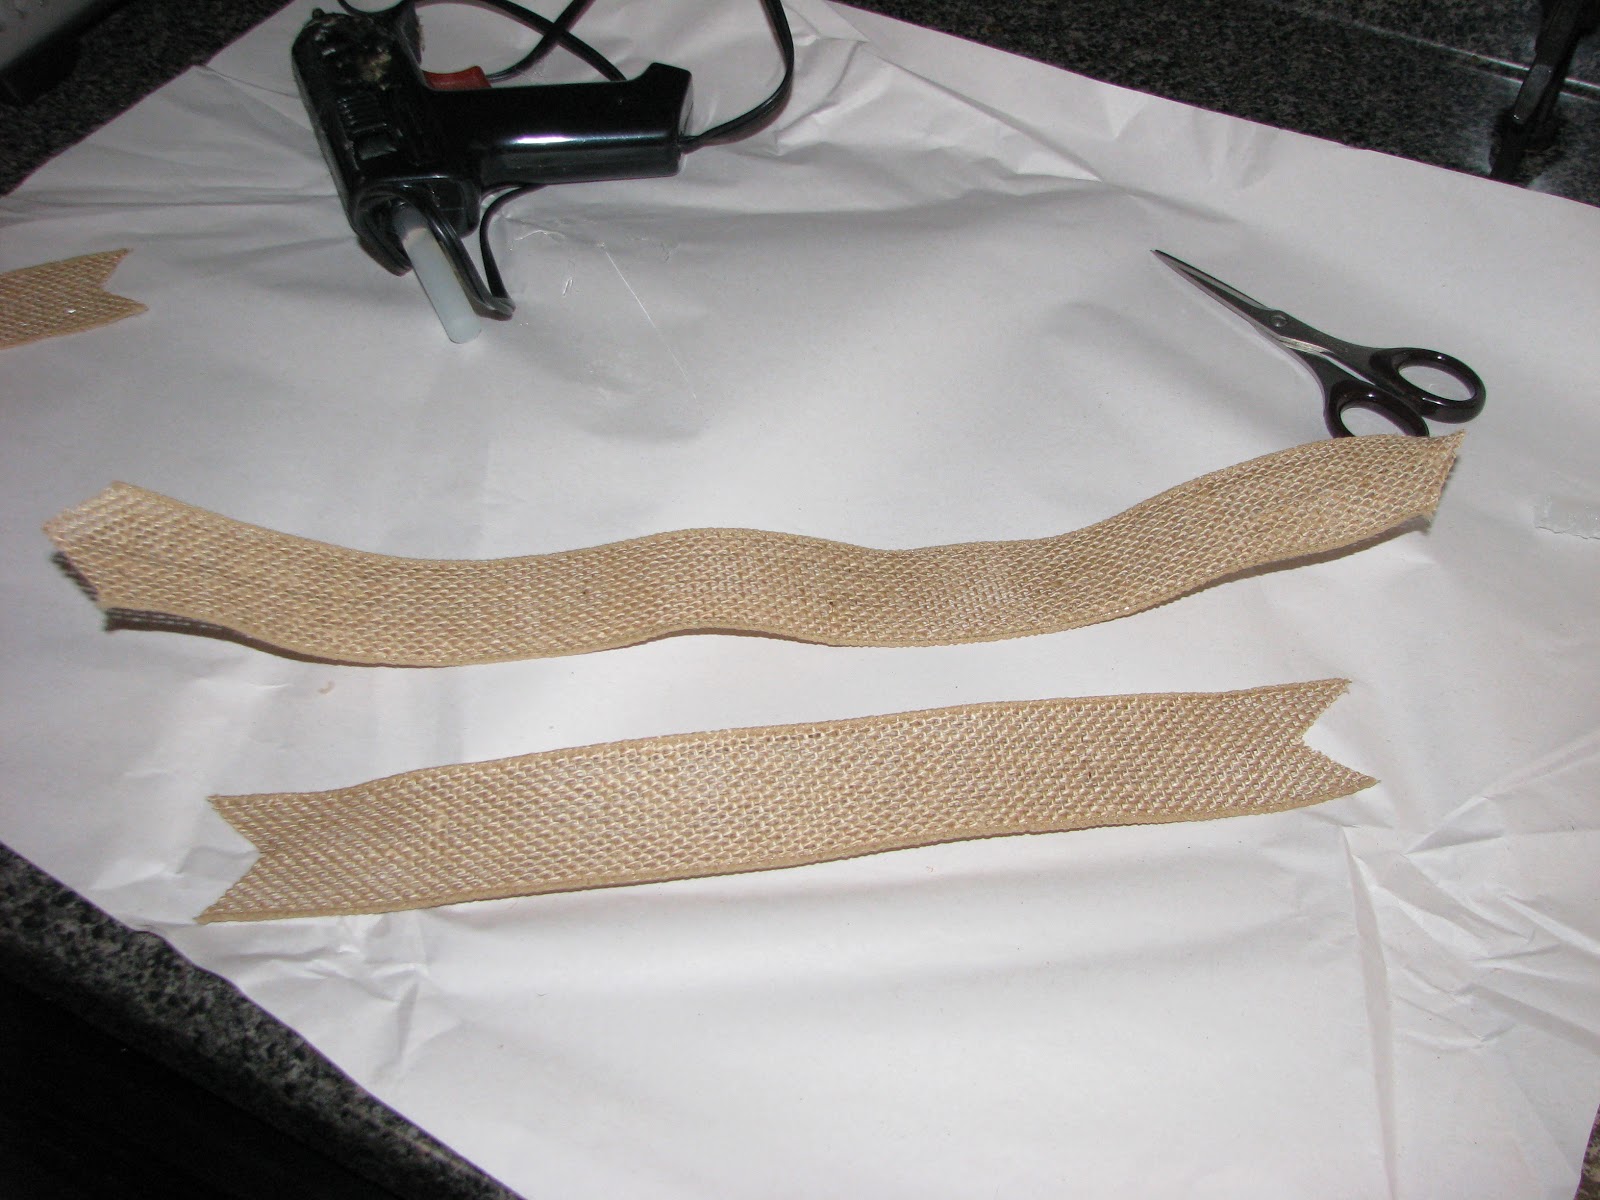
The most difficult part was deciding how long to cut the ribbon.  The bottom piece in the picture below is a tad longer than the width of the photo frame.  (Notice the ends are cut in.)  The top piece is what makes the bow, so it's actually easier to glue with the ends pointing out.  **After getting this put together, I actually decided it needed another piece of ribbon on the very back (you'll see this in the final picture.)  If you want yours to look the same, you'll need one additional piece cut a little longer than the bottom piece in the picture below.
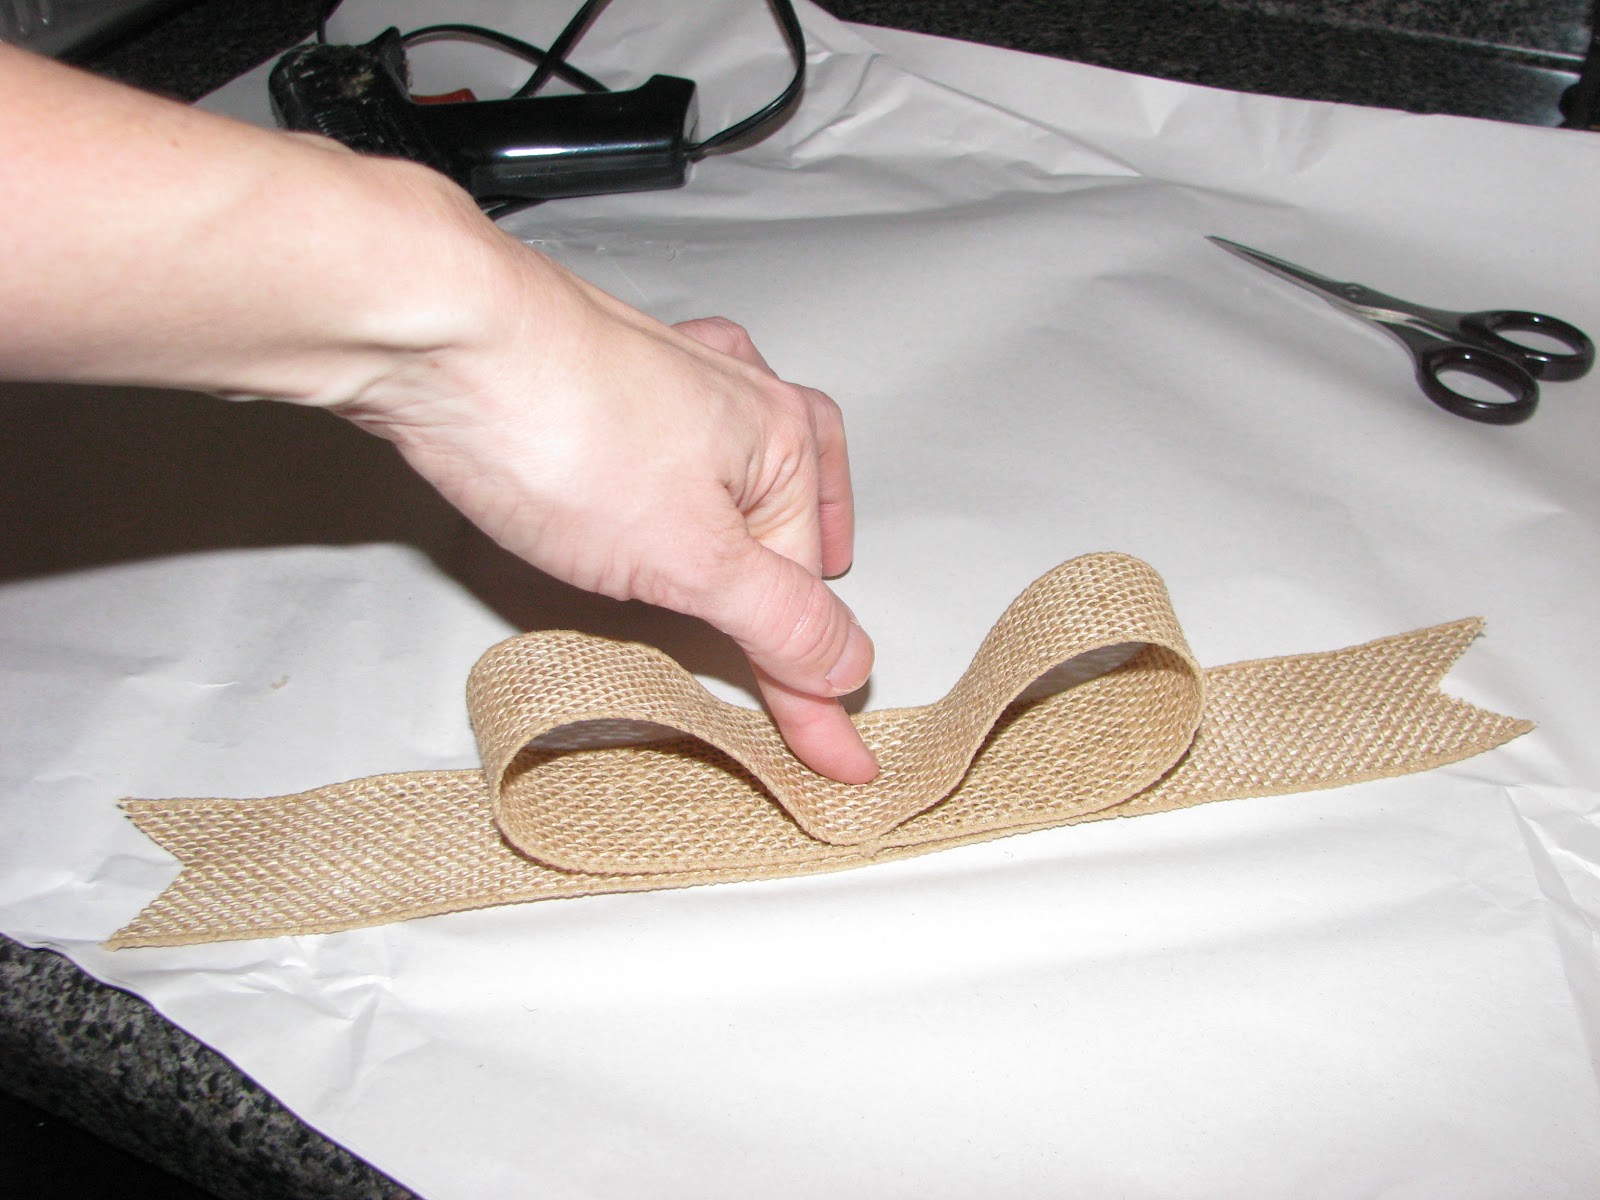
Make the bow by glueing the two ends together and then 
glueing the center down to where the two ends meet.  


The bow gets glued onto the flat piece of ribbon and then the rosette.
 A little hot glue on the back of the ribbon secures it to the picture frame and finishes off the project.
                                                      A closer view of the ribbon. . .

               One of the frames found a home in the living room.  I found a picture of Briley and
                 Daryl at last year's Valentine's dance (which you can't see for the horrible glare).
                                            The other frame found a home in our bedroom.

Saturday, February 16, 2013

Happy Valentine's Day!

I've never been a big fan of Valentine's Day (or New Year's Eve).  Maybe it's because those are the only two holidays that you really needed to be with someone to celebrate, and even though Daryl and I have been together for 12 years, I still don't care for them.
But since Briley and Brady have come along, I do get into the spirit for them.  This year I decided that instead of buying yet another stuffed animal and a bag full of candy that we would just have a special dinner with a couple of special treats.
They were so surprised when they woke up to find the kitchen table decorated for our special Valentine's dinner.  The long stem rose was a present from the students in one of our agriculture classes, the cupcakes were from Riley's Bakery, and the mailboxes were from the Target dollar section and contained the kid's special treats.

Aren't those straws adorable?


Briley is all smiles before opening her mailbox.


Riley's tea cookies and money! 
My poor John Brady came home from school with a fever and had just gotten up from a long nap on the couch. 
He was less excited about the cookies and more excited about the money.  
Our special Valentine's Dinner - Hot and Ready Pizza!


Friday, February 8, 2013

These are a few of my favorite things


My husband's step-father has been telling me about this forever, but it's one of those things that never makes it on my grocery list.  I finally remembered to look for it one day at Wal-Mart when I was in the cleaner aisle and found it tucked away on the bottom shelf.  It was fairly cheap, only a couple of bucks and I grabbed me up a can.  
My stainless steel sink was the first thing I cleaned.  While it didn't remove all the scratches (not sure that anything will), it did give it a really good cleaning.  
Since our stove is just a couple of months old, it really didn't need it that badly, but I went ahead and cleaned the smooth top surface.  The cleaner is a bit grimey - kind of like Comet.  I used a damp sponge to give it the consistency of a paste, but it was still a bit difficult to get all of the cleaner off of the stove top.
Then I tackled my pots and pans.  This is where the cleaner worked the best.  I have some fairly expensive Calphalon cookwear that is so hard to clean.  It had several grease spots that I could not scrub off.  The Bar Keepers Friend made it look new!  
There are a million other things this stuff can be used on.  Again, for the money, this stuff works great!

Wednesday, February 6, 2013

I'm dreaming. . . . . .

I am soooo longing for warmer weather!  The crazy thing is, it's really not even been that cold!  We've had nothing more than some snow flurries and, with the exception of a few days, it's not been below freezing.
One thing is for sure, my to-do list for Spring is very, very long!


184789792443730911_39953713.jpg